 LinkBack URL
 About LinkBacks
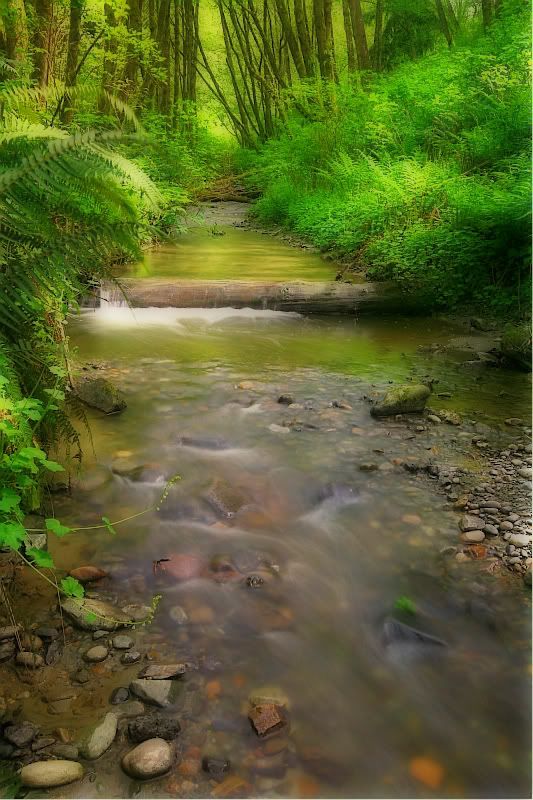
got a case of cabin fever this afternoon, so i went exploring along a small creek that flows through a park a few miles from my place. 5D, 24-135 @ 31mm, 1.6 sec @ f/20...

This is a discussion on Pigeon Creek within the Show your photo (Color) - Landscape & Nature (flowers, mountains, storms etc.) forums, part of the Photography & Fine art photography category; got a case of cabin fever this afternoon, so i went exploring along a small creek that flows through a ...
 Senior Member
got a case of cabin fever this afternoon, so i went exploring along a small creek that flows through a park a few miles from my place. 5D, 24-135 @ 31mm, 1.6 sec @ f/20...
~ Rocky
Any camera will record what you see, but you have to see!
http://www.northwestnaturalimagery.com
Moderator
What a nice little stream. There's something about ferns that appeal.
Senior Member
I love ferns. Ours are not out yet. I love the dreamy feel to this Squirl. How did you get that effect?
Feel free to make comments on any of my shots
my blog: http://bambesblog.blogspot.com/
My flickr photostream: http://www.flickr.com/photos/bambe1964/
A painter takes their vision and makes it a reality. A photographer takes reality and makes it their vision.
Senior Member
Bambi, it's called the "Orton Effect", named after a Vancouver Island photographer Michael Orton who perfected it with slide film. You can do it in Photoshop - here's how...Originally Posted by Bambi

1. Open any image you wish to try the technique on. Make a duplicate of the image (Image > Duplicate). Close the original image.
2. Lighten the image as follows: Image > Apply Image Then, in the dialog box that comes up, change the blending mode to Screen and the Opacity to 100%. This will give you an appropriately overexposed image.
3. Duplicate this overexposed image (Image > Duplicate).
4. Blur this second image (Filter > Blur > Gaussian Blur) and in the dialog box use a Radius setting of 15 to 50 pixels the higher the pixel setting the blurrier the photo and the more painterly the image (but you can go too far!). Experiment with different settings, for my tastes and for the size of my digital files, a radius of about 25 pixels works perfect.
5. Now select the move tool from the Photoshop tool bar (or just press v on your keyboard for quicker access to the move tool). Hold down the shift key and use your mouse to drag and drop the blurry image onto the sharp one (dont let go of the shift key until after you release the mouse button or the images wont be in perfect alignment).
6. Bring up the layers palette in Photoshop (F7 is the keyboard shortcut). Under the word Layers in the layers palette will be a menu box of blending modes. Change the blending mode from normal to multiply.
7. Now flatten the two layers by pressing CTRL+E or by clicking on the sideways triangle in the layers palette to select flatten image.
That's it! Save the file and you're done...
~ Rocky
Any camera will record what you see, but you have to see!
http://www.northwestnaturalimagery.com
Senior Member
There is a good pod cast on it from our fearless leader.
Senior Member
thanks Squirl. I thought it might be.
Feel free to make comments on any of my shots
my blog: http://bambesblog.blogspot.com/
My flickr photostream: http://www.flickr.com/photos/bambe1964/
A painter takes their vision and makes it a reality. A photographer takes reality and makes it their vision.
 Posting Permissions


 Reply With Quote
Bookmarks