 LinkBack URL
 About LinkBacks
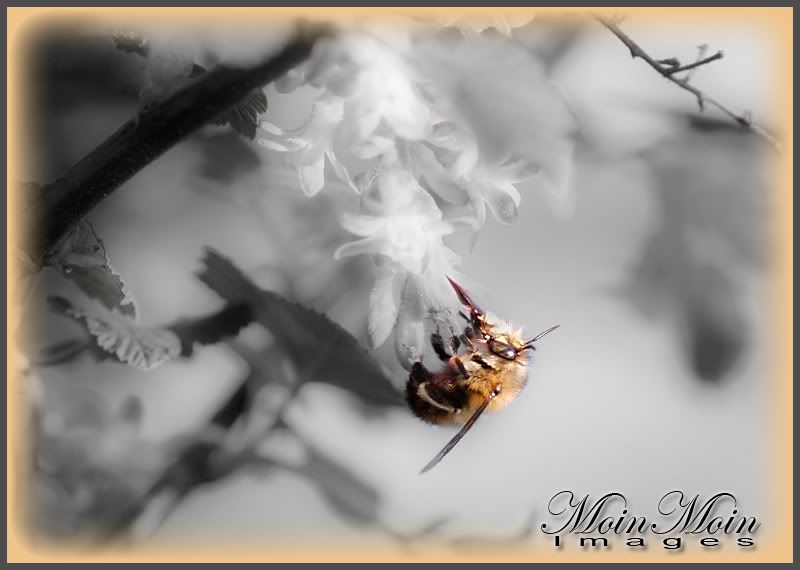
Well, would have preferred a better presentation for this photo - but I can't get rid of the overexposing. I tried the Burning Tool - but it won't work well enough. Do you have any suggestions?


This is a discussion on Help with the overexposing? within the Critiques forums, part of the Photography & Fine art photography category; Well, would have preferred a better presentation for this photo - but I can't get rid of the overexposing. I ...
 Senior Member
Well, would have preferred a better presentation for this photo - but I can't get rid of the overexposing. I tried the Burning Tool - but it won't work well enough. Do you have any suggestions?
Senior Member
Hi Moin Moin
I'm no Photoshop guru but two ways I know are adjusting levels (control L) which is best and Exposure (Image/Adjustment/exposure). You would have to lower the exposure first then use the middle slider in levels to lighten the mid tones.
Member
Usually I dodge/burn with a layer set to a blending mode of soft light and paint black to burn and white to dodge. Paint with a large and soft-edged brush and at 10%-20% opacity to keep it subtle.
For areas that are almost pure white or are pure white, that won't work. Make a new layer with a normal blending mode and paint black at 1%-5% opacity to darken areas down.
Moderator
Are you shooting RAW Kerstin? If so you may be able to save that in Lightroom or Camera RAW etc using the recovery and/or exposure function.
I'm not sure you will save it in jpg though if you didn't shoot RAW. I gave it a quick go before I tried to give advice but failed to get good results.
In the end, without a RAW file to play with you may have to consider going more artistic with it ... something like this ...
Senior Member
As MA says if you shot this in RAW you might be able to recover some of the highlights. But if that ship has sailed, I also am no Photoshop guru, but I've found that no matter if you are using the actual burn tool, or Kelby's technique (much like Alex mentions), it ends up looking gray and fakey on blown highlight areas. So all you can do is leave it or if it really bothers you try getting creative and paint something back into the blown areas. For what it's worth, I think it's a nice photo despite the blown highlights.
If anyone else has the technique to solve this I'm very curious to learn it.
Senior Member
since you can't reshoot this, open the image in photoshop, then duplicate layer and set it to multiply. the effect of this is like having two light transparencies or slides put together to make it darker. then click the layer mask icon at the bottom of the layers pallette to make a layer mask and fill with 50% gray to make it a little lighter. then brush with white the flowers to darken it, flatten and save.
i hope this helps.
Moderator
I tried that Ed but still couldn't really make much of a positive effect on those blown areas.
It's not a technique I use too often though so perhaps it's just me. Having the original might make a difference.
Senior Member
i selected the blownout areas and put it in another layer and duplicated it about 10 times, in multiply. luckily, some detail came out in some parts but the colors came out wrong. i merged the layers of the blown out areas but now with some details and adjusted the colors in hue and saturation to make it white. added layer mask and brushed the rough edges with soft brush at 30% opacity and flattened. i attached the result.
this does not always work with some cases like this especially if they are really blown out.
HAPPY EASTER TO ALL!
 Posting Permissions


 Reply With Quote
Bookmarks