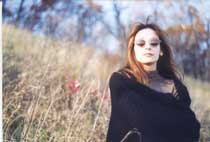
The Background — What is Going on in the Background
One of the key factors that separate the novice photographer from the advanced photographer is the background. Novice photographers just photograph the principal subject (baby, dog, grandpa etc.) and don’t pay attention to the background. This is a huge mistake. The background is an important part of any photograph, and in most cases you can control it in various ways.
Awareness
The first and easiest step involves awareness. Be aware of what’s going on in the background. Let’s say you are photographing a baby being held by mom outdoors on the patio. You can place the mom pretty much anywhere that is safe for her and the baby. Let’s say you have her sitting on a chair. Now what is going on in the background? Can you see the street? Is there a parking lot behind her? Is there a telephone pole behind her? Does the balcony railing look like it’s going through the mom’s head? Once you learn to pay attention to the background you can then make judgment calls as to whether the background is distracting or not.
In general, background objects should not intersect with the principal subject. The background should blend with the foreground and not become a distraction. In our example above if there was a telephone pole right behind the mom’s head, or the background was a parking lot littered with garbage, then that would be distracting (unless you wanted it that way and were AWARE of it) In this example it might well be best to have trees in the background, or to place the actual building wall behind the subject. These types of backgrounds don’t draw attention to themselves and so they emphasize the principal subject of the photograph.
An advanced photographer will always be aware of the background. If there are some distracting elements in the scene, the photographer can move distracting objects, change his/her angle, change locations or even shoot a close-up if possible.
Aperture
Aperture (Click here for a full explanation on controlling aperture) refers to the size of the opening in a lens. If you are using a regular or digital SLR you can control the size of the aperture. Apertures are measured in F-stops where larger aperture numbers (i.e. F 22, F 32 etc) mean that the actual lens opening is getting SMALLER. A good way to think of it is as a fraction. 1/22 is larger than 1/32. Conversely, smaller aperture numbers ( F 1.4, F 2.8 etc.) mean that the the lens opening is getting larger. This is important to know because the size of the aperture also affects the sharpness of the foreground and background. A large aperture will make the background somewhat blurry. A small aperture will keep both the foreground and the background sharp.

F-2.0 A shallow depth of field. Note how the foreground is sharper than the background.

F-16 A large depth of field. Note how both the foreground and background are sharp.
This is an important consideration to take into account. In the example above with the mother and baby, you might well want to choose a large aperture like F 2.0 or F 2.8. That way the background will be thrown out of focus which usually makes for a very pleasing portrait. On the other hand let’s say you were taking a landscape shot. In this case you might well want to keep both the foreground and the background sharp. In this case you might want to choose an aperture of F-16 or F-22.
The viewfinder as a clock
A good technique for examining what’s going on in the scene is to look at your viewfinder like a clock. When most people look though the viewfinder all they usually see is the foreground. A good technique to ‘see’ the whole scene is to look through the viewfinder and treat the scene as a clock. What is going on at 12:00, 1:00, 3:00 etc. By doing this you will see where the distracting elements are and how you can minimize them. Although this technique may take a few extra moments at the beginning of the session the resulting photographs will improve immensely.
© Photography.ca and Marko Kulik
All rights reserved.


