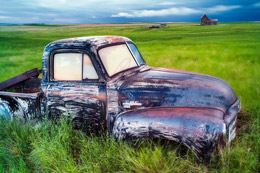
Lens Hoods are necessary

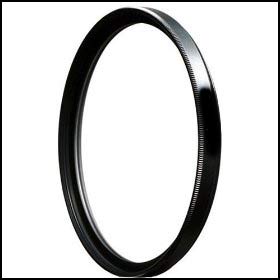
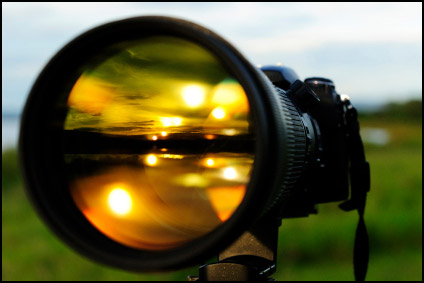
Out of all the acces­sories to buy for your cam­era, is it truly nec­es­sary to invest in a lens hood? The answer is YES. A lens hood will help pro­tect the front of the lens from bumps and acci­dents, but it is also great for pre­vent­ing lens flare. Lens flare hap­pens when light does not flow through the lens to the sen­sor or film but instead, bounces around the lens ele­ments. This cre­ates unusual and unwanted (nor­mally) arti­facts in the image. Com­mon shapes include poly­gons and lin­ear streaks. How­ever flare can also wash out an image in addi­tion to the weird shapes it cre­ates. The shapes of these arti­facts are depen­dent on the lens ele­ments, the aper­ture blades and the angle of the light.‚ A com­mon sit­u­a­tion where this hap­pens is when you are shoot­ing into a light source like the sun or the light source enters the lens from an angle. Although the sun is the most com­mon thing to cause flare, any light source can cause it if it hits the front of the lens at the right angle.
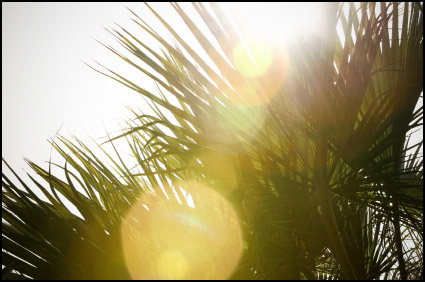
The sim­ple solu­tion to this is buy a lens hood. They are inex­pen­sive and they help pre­vent stray light from enter­ing your lens. Many pros keep them on their lenses 100% of the time, even at night, since city lights and car lights can cause flare.

You could use your hand to block the light of course… it is cer­tainly a cheaper alter­na­tive! But for the long run, the lens hood will be quite ben­e­fi­cial in both pro­tect­ing your lens (from the wild party hap­pen­ing next to you) and in pro­duc­ing shots with­out the ‘unwanted’ flare.

Check out this link in our pho­tog­ra­phy forum for more infor­ma­tion or to com­ment on this topic.

70 — Getting sharper images — common problems

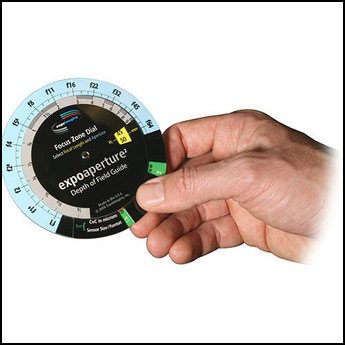
Pho­tog­ra­phy pod­cast #70 dis­cusses why some­times our pho­tographs do not appear sharp enough.‚ We touch on sev­eral impor­tant fac­tors that all com­pro­mise image sharp­ness. For new­bies in par­tic­u­lar, we also men­tion the depth of field guide which clearly tells the pho­tog­ra­pher the zone of sharp focus (in feet and inches or cen­time­ters and meters depend­ing on the guide) to expect with a given aper­ture and lens.

Depth of field guide

Depth of field guide

Links /resources men­tioned in this pod­cast:
Portable depth of field guide from B&H
Free depth of field table for most dig­i­tal cameras

August’s‚ “Water”‚ assign­ment on the Photography.ca forum

If you are still lurk­ing on our forum,
feel free to join our friendly :) Pho­tog­ra­phy forum

Thanks as always to every­one that sent com­ments by email about our last pod­cast. Although ALL com­ments are appre­ci­ated, com­ment­ing directly in this blog is pre­ferred. Thanks as well to all the new mem­bers of the bul­letin board.

If you are look­ing at this mate­r­ial on any other site except Photography.ca — Please hop on over to the Photography.ca blog and pod­cast and get this and other pho­tog­ra­phy info directly from the source. I Sub­scribe with iTunes I Sub­scribe via RSS feed I Sub­scribe with Google Reader I Sub­scribe for free to the Pho­tog­ra­phy pod­cast — Photography.ca and get all the posts/podcasts by Email
You can down­load this pho­tog­ra­phy pod­cast directly by click­ing the pre­ced­ing link or lis­ten to it almost imme­di­ately with the embed­ded player below.

69 — Street photography tips

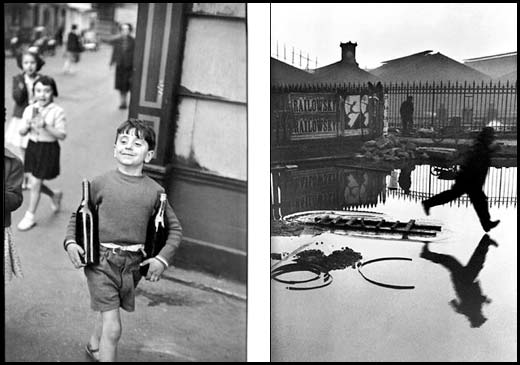
Pho­tog­ra­phy pod­cast #69 dis­cusses street pho­tog­ra­phy; what gear to use, what to shoot, how to shoot, should I ask the subject’s per­mis­sion before I shoot etc. This topic was sug­gested by TJD of our pho­tog­ra­phy forum, so many thanks TJD! One thing I for­got to men­tion dur­ing the pod­cast con­cerns model releases. If you never plan to sell the image, in Canada and the U.S. at least, you prob­a­bly (I’m not a lawyer so this advice is worth what you paid for it as opposed to 2oo bucks an hour) don’t need one. If you plan to sell the images you shoot, then it makes good sense to bring a release form with you.

Street photography by Henri Cartier Bresson

Rue Mouf­fe­tard, Paris and Behind the Gare St. Lazare, Paris by Henri Cartier-Bresson

Links /resources men­tioned in this pod­cast:
Henri Cartier-Bresson
Robert Dois­neau

July’s Heat” assign­ment on the Photography.ca forum

If you are still lurk­ing on our forum,
feel free to join our friendly :) Pho­tog­ra­phy forum

Thanks as always to every­one that sent com­ments by email about our last pod­cast. Although ALL com­ments are appre­ci­ated, com­ment­ing directly in this blog is pre­ferred. Thanks as well to all the new mem­bers of the bul­letin board.

If you are look­ing at this mate­r­ial on any other site except Photography.ca — Please hop on over to the Photography.ca blog and pod­cast and get this and other pho­tog­ra­phy info directly from the source. I Sub­scribe with iTunes I Sub­scribe via RSS feed I Sub­scribe with Google Reader I Sub­scribe for free to the Pho­tog­ra­phy pod­cast — Photography.ca and get all the posts/podcasts by Email
You can down­load this pho­tog­ra­phy pod­cast directly by click­ing the pre­ced­ing link or lis­ten to it almost imme­di­ately with the embed­ded player below.

Memory Cards

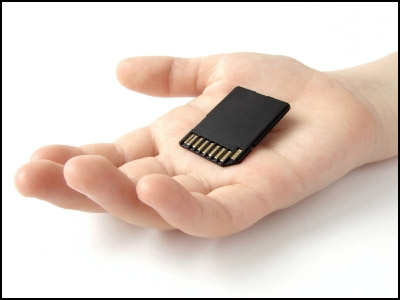
Let’s talk mem­ory cards. More specif­i­cally mem­ory cards with higher writ­ing speeds, qual­ity, and size. Higher writ­ing speeds are a def­i­nite asset when shoot­ing things like wed­dings, lit­tle league games and dance recitals — any­thing that requires you to shoot long bursts of shots. Higher writ­ing speeds are also use­ful when the card is full and you need to trans­fer the images to a com­puter as quickly as pos­si­ble via a card reader.

Qual­ity is cer­tainly not com­pro­mised whether or not you pur­chase a ‘brand name’ ver­sus a ‘no name’ mem­ory card — if the card works, chances are you have pur­chased a fine card which will hold those price­less moments for you.

And what about size… does it really mat­ter? 2GB, 4GB, 8GB… it’s all a mat­ter of pref­er­ence. But a great tip for those who shoot events would be to buy a few smaller mem­ory cards (4 GB) in case some­thing ‘should’ hap­pen to one card, you know you have a few other cards that your shots are on. Now that’s safe think­ing! FORUM LINK:‚ http://www.photography.ca/Forums/showthread.php?t=2522

How Important are External Flashes?

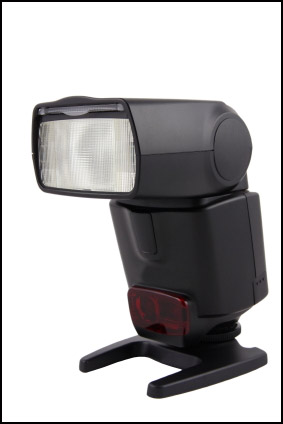
Exter­nal Flashes have many advan­tages over on-camera flashes; not only is an exter­nal flash much more pow­er­ful than a small‚on-camera flash, but it also has a tilt-able head so that you can bounce it. Bounc­ing a flash is a great way to soften the light since direct flash is quite harsh.

An exter­nal flash gives you far more con­trol over how you want the scene lit — the built in flash on your cam­era is usu­ally only good enough to light a sub­ject from a short dis­tance and the light from the flash can only be used from one plane. This is another area where an exter­nal flash shines :)

Exter­nal flashes can be taken off cam­era. This allows the pho­tog­ra­pher to cre­atively light a sub­ject from dif­fer­ent angles. You’ll need a way to trig­ger the flash and there are sev­eral good meth­ods depend­ing on your bud­get. The cheap­est way (20 bucks or less) is with a sync cord but a bet­ter way is a wire­less trig­ger­ing sys­tem like the Pocket Wiz­ard.

So if your bud­get can cope, an exter­nal flash is a prime invest­ment and a step­ping stone to get­ting you closer to the ‘advanced pho­tog­ra­pher’ sta­tus. For addi­tional info check this link from our pho­tog­ra­phy forum.

Lenses not making your image sharp? Think again.

Lenses are one of the most impor­tant com­po­nents of your cam­era in terms of get­ting crisp and clear images. The lens does all the focus­ing, so the bet­ter the lens, the bet­ter the pho­to­graph (espe­cially when mak­ing enlarge­ments). How­ever, there are other ele­ments respon­si­ble for the sharp­ness of your images. Before you blame an unsharp pho­to­graph on the lens, there a few other cru­cial things to con­sider. In fact I hate to say this but the vast major­ity of unsharp shots are the result of pho­tog­ra­pher error not a lemon lens.

Shut­ter speeds that are too slow for some shots such as mov­ing tar­gets, will not pro­duce the sharp­ness you are look­ing for if you are look­ing to ‘freeze’ the action. Mov­ing tar­gets require faster shut­ter speeds. Gen­er­ally though, for objects that are not mov­ing, the rule of thumb is 1/focal length of the lens as the slow­est shut­ter speed to use while hand hold­ing a cam­era. This means that if you have a 200mm lens the SLOWEST hand­held‚ shut­ter speed you need on any sub­ject is 1/200. Choos­ing a speed slower than that intro­duces the photographer’s own move­ment into the image and sharp­ness is sac­ri­ficed. Gen­er­ally fol­low­ing this rule will give you favor­able results. Prac­tic­ing at dif­fer­ent shut­ter speeds will give you a good grasp on things; so prac­tice, prac­tice, prac­tice. While you’re prac­tic­ing, slap the lens on a tri­pod and shoot some text on a news­pa­per pasted to your wall at dif­fer­ent aper­tures. Use a cable release. Now you can gauge the sharp­ness of that lens you were questioning!

For more info on this topic click the link to our Pho­tog­ra­phy forum

68 — Creating a photography portfolio

Pho­tog­ra­phy pod­cast #68 dis­cusses how to to pre­pare a port­fo­lio for clients, agen­cies gal­leries etc. Even though we are in the dig­i­tal age, when it comes to pre­sen­ta­tion, noth­ing beats a beau­ti­fully printed pho­to­graph. This pod­cast shares some tips and tricks on putting together a great portfolio.

Links /resources men­tioned in this pod­cast:
Pre­sent­ing pho­tog­ra­phy to gal­leries — Pod­cast #53
June’s low shoot­ing angle assign­ment on the Photography.ca forum

If you are still lurk­ing on our forum,
feel free to join our friendly :) Pho­tog­ra­phy forum

Thanks as always to every­one that sent com­ments by email about our last pod­cast. Although ALL com­ments are appre­ci­ated, com­ment­ing directly in this blog is pre­ferred. Thanks as well to all the new mem­bers of the bul­letin board.

If you are look­ing at this mate­r­ial on any other site except Photography.ca — Please hop on over to the Photography.ca blog and pod­cast and get this and other pho­tog­ra­phy info directly from the source. I Sub­scribe with iTunes I Sub­scribe via RSS feed I Sub­scribe with Google Reader I Sub­scribe for free to the Pho­tog­ra­phy pod­cast — Photography.ca and get all the posts/podcasts by Email
You can down­load this pho­tog­ra­phy pod­cast directly by click­ing the pre­ced­ing link or lis­ten to it almost imme­di­ately with the embed­ded player below.

Signing’ your prints

When Picasso signed his paint­ings, he did so using his paint­brush and oils and gen­er­ally placed his sig­na­ture at the bot­tom right or left of his art pieces. So when ‘sign­ing’ a photo that you are selling/giving away, what can be done as an artist to label your work?


A nice idea is to place a sim­ple bor­der around the photo, and have your sig­na­ture and the photo’s title 1/8 of an inch below the photo. If not opt­ing for a bor­der, another idea would be to keep it ‘clean’ by plac­ing a sig­na­ture in the bot­tom right cor­ner of the photo itself. Keep in mind though that‚you want to keep the photo clear and not have your sig­na­ture or bor­der dis­rupt ele­ments in the photo.

Some pho­tog­ra­phers choose to sell their pho­tos with mats already attached, and some­times they sign the mat­ting and not the image. This seems silly IMO; after all the pho­tog­ra­pher cre­ated the image not the mat­ting so why sign the mat­ting? Also, the mat­ting can be sep­a­rated from the print and so the sig­na­ture or logo can get ‘lost’.

Some clients how­ever pre­fer not to have a border/signature/title ‘dis­rupt­ing’ their photo. In cases as such, you may want to con­firm with your client first prior to print­ing. As an alter­nate way to sign your prints, a stamp with your logo/signature on the back of the print may be a nice final touch.

For more info, feel free to check out the link on our pho­tog­ra­phy forum.

Signing’ your prints

When Picasso signed his paint­ings, he did so using his paint­brush and oils and gen­er­ally placed his sig­na­ture at the bot­tom right or left of his art pieces. So when ‘sign­ing’ a photo that you are selling/giving away, what can be done as an artist to label your work?


A nice idea is to place a sim­ple bor­der around the photo, and have your sig­na­ture and the photo’s title 1/8 of an inch below the photo. If not opt­ing for a bor­der, another idea would be to keep it ‘clean’ by plac­ing a sig­na­ture in the bot­tom right cor­ner of the photo itself. Keep in mind though that you want to keep the photo clear and not have your sig­na­ture or bor­der dis­rupt ele­ments in the photo.

Some pho­tog­ra­phers choose to sell their pho­tos with mats already attached, and some­times they sign the mat­ting and not the image. This seems silly IMO; after all the pho­tog­ra­pher cre­ated the image not the mat­ting so why sign the mat­ting? Also, the mat­ting can be sep­a­rated from the print and so the sig­na­ture or logo can get ‘lost’.

Some clients how­ever pre­fer not to have a border/signature/title ‘dis­rupt­ing’ their photo. In cases as such, you may want to con­firm with your client first prior to print­ing. As an alter­nate way to sign your prints, a stamp with your logo/signature on the back of the print may be a nice final touch.

For more info, feel free to check out the link on our pho­tog­ra­phy forum.

Filters for lens protection

There is a great debate among pho­tog­ra­phers as to whether or not lens fil­ters need to be used for lens pro­tec­tion. Pho­tog­ra­phers are divided when it comes to fil­ters and image qual­ity. Many believe that adding a fil­ter to the lens reduces the image qual­ity while other pho­tog­ra­phers feel there are lit­tle to no effects to the photograph.


A fil­ter is not only used to‚protect against every day use. UV fil­ters offer pro­tec­tion against UV rays that may dam­age our lenses, and Sky­light fil­ters reduce the haze and clar­ify the photo. But really, are these truly nec­es­sary? Many pho­tog­ra­phers sug­gest that they have no notice­able effect in most cir­cum­stances. Lenses are made so strong today, that the ques­tion remains…“To use a fil­ter, or not to use a filter?”

Feel free to add your com­ments here or join our pho­tog­ra­phy forum and add to the con­ver­sa­tion. Here’s a link to the topic in the pho­tog­ra­phy forum.

Quality of Lenses

What real advan­tages are there when spend­ing extra money on an expen­sive lens over its cheaper counterpart?


When com­par­ing pro lenses to the ‘cheaper’ lenses, the higher priced lenses deliver bet­ter qual­ity for the most part. Depend­ing on the lens you might also get expe­dited auto-focus, sharper images and less chro­matic aber­ra­tion.‚ Per­haps the biggest advan­tage though is with regard to aper­ture. More expen­sive lenses are often faster. This means that their largest F-stop (small­est num­ber eg. F1.8, F2.0, F2.8 etc) is usu­ally larger than cheaper lenses. Remem­ber, the larger the aper­ture, the more room you have to use a faster shut­ter speed. In addi­tion, the larger the lens’s aper­ture, the eas­ier it is to shoot in lower light because when you look through the viewfinder you are look­ing at a scene through the lens’s largest aper­ture. If a lens has a max aper­ture of F2.8, any scene you look at through your viewfinder will look BRIGHTER than if the lens’s widest aper­ture was F4.0. It makes no dif­fer­ence what F-stop you use dur­ing the actual expo­sure. This doesn’t make a dif­fer­ence in bright sun­light, but in makes a huge dif­fer­ence in low light where it is eas­ier to focus if the viewfinder is brighter. On the neg­a­tive side, higher priced lenses with larger aper­tures will often‚ buy you sig­nif­i­cantly more ‘weight’ as well.

When com­par­ing the results of pro lenses to the ‘mid-range’ priced lenses (pro-consumer level), there doesn’t seem to be a notice­able dif­fer­ence to many advanced pho­tog­ra­phers so long as the images are kept small. This is espe­cially true if the images are for Inter­net use only.

If you’re still skep­ti­cal and want to test the waters your­self, you can always take the same pic­ture using two dif­fer­ent lenses to prove a point. Or, an eas­ier route is to search the web for some­one who’s already taken the time to do it — much easier!

As a final point, when peo­ple (pho­tog­ra­phy newbies/hobbyists) ask me what cam­era to buy, they never ask about lenses which is a mon­ster mis­take. I ALWAYS coun­cil newbies/hobbyists to spend MORE on the lenses than the cam­era, espe­cially the first ‘expen­sive’ cam­era. This is because the cam­era is just a box with a flap to let light in. The LENS does all the focus­ing so a poor lens on an expen­sive cam­era will give you a poor result. A great lens on an aver­age cam­era will give you a great result (in the right hands of course ;) )
When you’re just learn­ing though you can eas­ily learn on a used or lower end DSLR that you’ll surely replace as tech­nol­ogy changes. The lenses though, you can keep those for decades. Trust me, spend the dough on the lenses.

Check out the link in our pho­tog­ra­phy forum for more info.

67 — Orton Imagery — The Orton Effect — Interview with Michael Orton and Darwin Wiggett

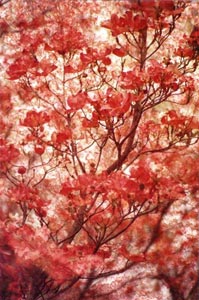
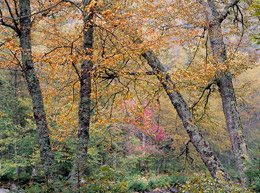
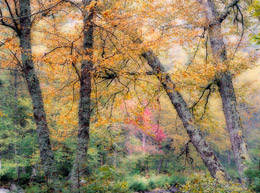
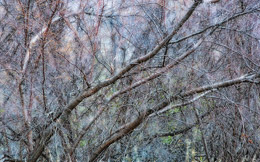
Pho­tog­ra­phy pod­cast #67 dis­cusses how to use Orton Imagery (AKA the Orton effect or the Orton Tech­nique) to give your pho­tographs an ethereal/painterly feel. This tech­nique was invented by Michael Orton in the mid 1980’s using 2 pieces of over­ex­posed slide film sand­wiched together. The prin­ci­ples of this tech­nique can also be used in graph­ics pro­grams like Pho­to­shop to achieve a sim­i­lar effect. This pod­cast con­tains 2 inter­views; one with Michael Orton dis­cussing‚ the technique’s his­tory, and one with Dar­win Wiggett,‚ dis­cussing his method for cre­at­ing Orton Imagery using Pho­to­shop and other graph­ics pro­grams. Darwin’s step-by-step is out­lined below and his Pho­to­shop action is also included. Thanks a ton Michael and Darwin!!

Image by Michael Orton - click to enlarge

Orton Imagery by Michael Orton — Click to enlarge

NMP2823 - Non-Orton image by Darwin Wiggett - Click to enlarge

NMP2823 — Non-Orton image by Dar­win Wiggett — Click to enlarge

NMP2823 - Orton image by Darwin Wiggett - Click to enlarge

NMP2823 — Orton image by Dar­win Wiggett — Click to enlarge

NMP9058 - Orton image by Darwin Wiggett - Click to enlarge

NMP9058 — Orton image by Dar­win Wiggett — Click to enlarge

NMP6435 - Orton image by Darwin Wiggett - Click to enlarge

NMP6435 — Orton image by Dar­win Wiggett — Click to enlarge

Here’s how to cre­ate Orton Imagery Using Pho­to­shop. Por­tion reprinted from from Orton Imagery — A …œHow to‚ guide for Pho­tog­ra­phers by Dar­win Wiggett. Thanks to Nature Pho­tog­ra­phers online mag­a­zine for allow­ing me to reprint this.

Dig­i­tal Tech­nique to Cre­ate Orton Images

Here, there are many ways to sim­u­late an Orton slide sand­wich. You can do it the same way as out­lined above for slides over­ex­pos­ing two sep­a­rate images and then in the com­puter stack­ing the images together in soft­ware and blend­ing them. Per­son­ally, I pre­fer to take my exist­ing dig­i­tized pho­tos (either from film scans or dig­i­tal cam­era files) and run­ning them through the process below to see if they work as …œOr­ton Images‚.

Here is the step-by-step recipe for mak­ing Orton images in Photoshop:

  1. Open any image you wish to try the tech­nique on. Make a dupli­cate of the image (Image>Duplicate). Close the orig­i­nal image.
  2. Lighten the image as fol­lows: Image>Apply Image‚¦ then in the dia­log box that comes up change the bend­ing mode to …œScreen‚ and the Opac­ity to 100%. This will give you an appro­pri­ately over­ex­posed image.
  3. Dupli­cate this over­ex­posed image (Image>Duplicate).
  4. Blur this sec­ond image (Filter>Blur>Gaussian Blur‚¦ and in the dia­log box use a Radius set­ting of 15 to 50 pix­els ‚” the higher the pixel set­ting the blur­rier the photo and the more ‹“painter­lyž the image‚¦ but you can go too far!). Exper­i­ment with dif­fer­ent set­tings, for my tastes and for the size of my dig­i­tal files (50–100 megabytes) a radius of about 25 pix­els works perfect.
  5. Now select the move tool from the Pho­to­shop tool bar (or just press …œv‚ on your key­board for quicker access to the move tool). Hold down the …œshift‚ key and use your mouse to drag and drop the blurry image onto the sharp one (donžt let go of the shift key until after you release the mouse but­ton or the images wonžt be in per­fect alignment).
  6. Bring up the lay­ers palette in Pho­to­shop (F7 is the key­board short­cut). Under the word …œLay­ers‚ in the lay­ers palette will be a menu box of blend­ing modes. Change the blend­ing mode from …œnor­mal‚ to …œmultiply‚.
  7. Now …œflat­tenž the two lay­ers by press­ing …œCTRL+E‚ or by click­ing on the side­ways tri­an­gle in the lay­ers palette to select ‹“flat­ten imagež.

There, you now have an Orton image — if you like your new mas­ter­piece save the file!

Copy­right Dar­win Wiggett and Nature Pho­tog­ra­phers Online Mag­a­zine — All rights reserved.
—————————————————————————————————

Dwayne Oaks from our pho­tog­ra­phy forum also lists the way he uses the Orton effect using NX2 soft­ware. Thanks Dwayne.
1-use mid­tone (lev­els) slider to brighten photo (2.04)
2-select gauss­ian blur, set radius slider to (15.85)px and opac­ity to (100)%
go to blend­ing mode and select (mul­ti­ply)
3-readjust (lev­els) slid­ers if nec­es­sary
4-in the case of my work to get the muted col­ors just turn down
the saturation

Links /resources men­tioned in this pod­cast:
More of Dar­win Wiggett’s work on Timecatcher.com
Pho­tograph­ing Cre­ative Land­scapes: Sim­ple Tools for Artis­tic Images and Enhanced Cre­ativ­ity by Michael Orton
Dances with Light by Dar­win Wiggett
Down­load Darwin’s Orton Action
June’s low shoot­ing angle assign­ment on the Photography.ca forum
See and vote on May 2009’s mem­ber images

If you are still lurk­ing on our forum,
feel free to join our friendly :) Pho­tog­ra­phy forum

Thanks as always to every­one that sent com­ments by email about our last pod­cast. Although ALL com­ments are appre­ci­ated, com­ment­ing directly in this blog is pre­ferred. Thanks as well to all the new mem­bers of the bul­letin board.

If you are look­ing at this mate­r­ial on any other site except Photography.ca — Please hop on over to the Photography.ca blog and pod­cast and get this and other pho­tog­ra­phy info directly from the source. I Sub­scribe with iTunes I Sub­scribe via RSS feed I Sub­scribe with Google Reader I Sub­scribe for free to the Pho­tog­ra­phy pod­cast — Photography.ca and get all the posts/podcasts by Email
You can down­load this pho­tog­ra­phy pod­cast directly by click­ing the pre­ced­ing link or lis­ten to it almost imme­di­ately with the embed­ded player below.