Short Photography Excursions by Ron Cardinale

For a lot of us, one big way we work on our pho­tog­ra­phy skills is by mak­ing short excur­sions that may be only a few hours long or even less. These brief sojourns can help us refine our craft. There’s a famous say­ing that luck favors the pre­pared. I’ve got some favorite loca­tions, which have changed over the years. Being famil­iar with them at var­i­ous times of the day, var­i­ous times of the year, and with dif­fer­ent weather con­di­tions is really help­ful. Some­times, these prac­tice shots have had a drama that wasn’t in my mind when I left the house. This pic­ture resulted from both pre­pared­ness and luck. (The loca­tion is in Fos­ter City which isn’t too far south of San Francisco.)
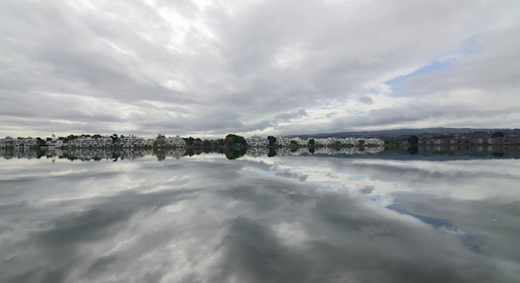
Image by Ron Cardinale

Image by Ron Cardinale

I’ve walked the shore of this lagoon many times. On this morn­ing, a storm was approach­ing from the Pacific. I had an idea of what to expect so I had my wide angle zoom with me and used it at 12mm for this shot. The luck part of it was being there at the right time to catch these dra­matic clouds with unusu­ally still water. I’d taken a few other shots around the lagoon that morn­ing but I like this one the best because the clouds and their reflec­tion appear to con­verge directly across the lagoon. Despite the calm con­di­tions on the ground, the clouds were mov­ing along so I didn’t have a lot of time. The con­verg­ing pat­tern was van­ish­ing and I could see that the clouds that were mov­ing in weren’t as dra­matic as these.

One issue with such a wide angle lens when shoot­ing a scene with bright clouds is that the lens sees a lot of those clouds so the camera’s meter very often reduces the expo­sure and the shot ends-up too dark. In pre­vi­ous shots, I had increased the expo­sure but that caused the loss of too much high­light detail in the clouds. The clouds are a key part of the image so it was impor­tant to hold detail in them. For this shot, I used the camera’s nor­mal meter­ing. The expo­sure was 1/500 at f/8 with ISO 100.  The result­ing image was dark but it held details in the clouds except right were the sun was.

I made some adjust­ments later at the com­puter. I made a quasi HDR photo from dif­fer­ent pro­cess­ings of the sin­gle raw image and also made a curves adjust­ment. A real HDR image sequence wasn’t fea­si­ble in this sit­u­a­tion because the clouds were mov­ing and the water wasn’t com­pletely still.   Have fun and keep shoot­ing!
Read a lit­tle more from Ron Car­di­nale at http://roncardinale.110mb.com
Is this shot considered cheating?

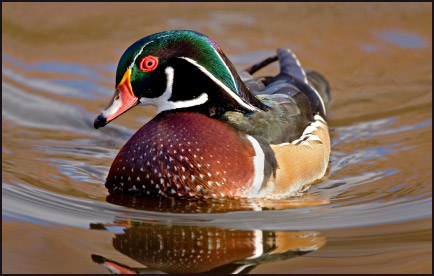
You’ve just cap­tured the most beau­ti­ful shot of a rare duck. Every­thing is per­fect — the com­po­si­tion, the color bal­ance, and the sur­round­ings. So do you tell peo­ple that you cap­tured this shot in a bird sanctuary?

Some peo­ple may argue that this shot is not jus­ti­fied because it was cap­tured at a bird sanc­tu­ary — ‘cheat­ing’ if you will. If a pho­tog­ra­pher gets a shot like this from a refuge, it’s far less of an achieve­ment (because it’s eas­ier) than it would be get­ting that shot in the bird’s nat­ural surroundings.

On the flip side, oth­ers stand by the notion that being in a sanctuary/zoo does not guar­an­tee great pic­tures. It just means bet­ter access and more oppor­tu­nity to cap­ture the beauty you are search­ing for.‚ You cer­tainly still need to have skills and a good eye.

So who wins this argu­ment? You tell me! See what oth­ers are say­ing in our pho­tog­ra­phy forum.

Shedding Some Light into Dark Rooms

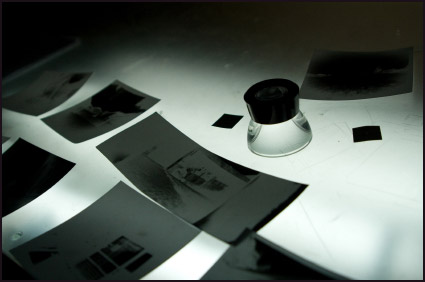
We’re in the dig­i­tal age, so why mess with‚a good thing by set­ting up an ancient dark­room? Well, set­ting up a dark room offers so much ‘hands on’ knowl­edge; it’s far more prac­ti­cal for learn­ing pho­to­graphic print­ing than you may think. The prin­ci­pals and tools of Pho­to­shop were par­tially based on how pho­tog­ra­phers worked in the dark­room. Curves, lev­els, crop­ping, sharp­en­ing, mul­ti­ple expo­sure print­ing, dodg­ing and burn­ing are just some of the things pho­tog­ra­phers have been doing in dark­rooms for generations.

Here’s 4 rea­sons why dark­room print­ing rocks;

1 — There’s that spe­cial ‘some­thing’ that comes from doing the major­ity of the work with your own hands. It is far more sat­is­fy­ing to pro­duce a print in the dark­room than by press­ing the print but­ton on your printer. Ask any good dark­room printer that has done both, they’ll tell ya. It’s true that dark­room print­ing takes longer and its pre­ci­sion is less accu­rate than dig­i­tal; and yet it’s still more sat­is­fy­ing.
2 — Since every­body is going dig­i­tal your work will stand out if you stay tra­di­tional.
3-‚ YOUR work will never be doomed to spend­ing its life on a hard drive or on a few web­sites, you’ll always have beau­ti­ful prints to hold and show off.
4 — I have a sneak­ing sus­pi­cion that dark­room prints printed today will be more valu­able than the same image printed dig­i­tally. Why? Because every dark­room print is some­what unique and tra­di­tion­ally, unique items have more value than mass pro­duced ones.

If you decide to set up a dark­room here’s a few things to be aware of. Before you start your dark­room make a floor plan of the room so you can more or less know how to lay­out the wet side and the dry side.‚ Will you be pro­cess­ing b&w and/or color? Colour print­ing is more com­plex (and requires a dif­fer­ent enlarger) than b/w print­ing so it’s prob­a­bly best to start with black and white. A good exhaust sys­tem is highly rec­om­mended as the chem­i­cals you’ll use (unless you buy a pro­cess­ing machine) are toxic.

What’s great to know is that because every­body and their uncle has gone dig­i­tal, there are amaz­ing deals on used dark­room equip­ment. Ebay is your friend!So get your feet wet! Enjoy a get­away from the dig­i­tal everyday…More on dark­rooms here in our pho­tog­ra­phy forum

Point and Shoot cameras are good

So you are into your DSLR or SLR, and can­not imag­ine using another cam­era… espe­cially a point and shoot cam­era, right? Well they are often a good thing to have on hand in addi­tion to your DSLR .

Point and shoots (P&S) aren’t ideal for learn­ing pho­tog­ra­phy. In fact they are a bad choice. Why? Because you can’t do many impor­tant things on most point and shoots (like change lenses, learn to man­u­ally focus a lens, man­u­ally meter eas­ily, change shut­ter speeds eas­ily etc.) that are essen­tial when learn­ing photography.

But — for some­one that already knows pho­tog­ra­phy, a point and shoot is very con­ve­nient due to its way smaller size. Many pho­tog­ra­phers want to have a cam­era with them at all times because there are always pho­to­graphic pos­si­bil­i­ties around us.

Would I ever bring a point and shoot to a pay­ing gig?‚ Maybe as a 3rd emer­gency backup. The cliche about not bring­ing a knife to a gun­fight holds true for pay­ing gigs and cheap cam­eras. But when I’m not shoot­ing, I want to relax with­out all the gear. I still need to carry pro­tec­tion (the P&S ) though, just in case.

Which point and shoot should you get?‚ There’s way too many out there to list. One that I have my eye on that seems like it may be tasty treat is the Canon Pow­er­Shot G11. It’s sup­posed to be out in Octo­ber. Buying/ordering through the B&H link above helps sup­port the site. Thx.

Photographing Tattoos — Tatoo photography

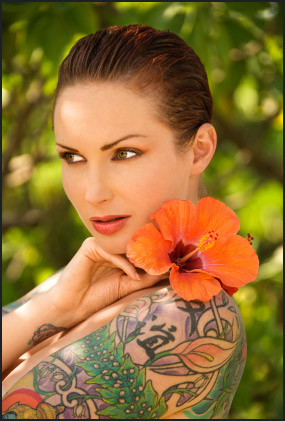
We eas­ily acquire tips to pho­to­graph flow­ers, peo­ple, and still life. Yet one sub­ject that often doesn’t have clear cut tips and direc­tions is pho­tograph­ing tat­toos. This sub­ject is art in itself, and to effec­tively shoot this piece requires not only patience and an eye for com­po­si­tion, but also tips from peo­ple that have already done it.

Tip one: Do not use a tri­pod unless you have a spe­cific effect (e.g blur) in mind. It is likely going to limit your mov­ing around and will take extra time to set up for each shot.

Tip two: If pos­si­ble, shoot out­side if you’re new to the game, or use great win­dow light, it’s so much eas­ier. Pay atten­tion to clut­ter and dis­trac­tions though. Be aware of what’s in the frame, what’s out of the frame, and make deci­sions on what to include or chop.

Tip Three:‚ Eas­ier light to han­dle might be around sun­set time or on a cloudy day with dif­fused light. A reflec­tor like white card­board can help if needed.

Tip Four: If you already know how to work with flash and/or are com­fort­able with your tech­nique, feel free to shoot in a tat­too shop if you get the per­mis­sion. You’ll likely get cool effects if you try slower shut­ter speeds on their own and/or mixed with flash.

You can find loads of fine tat­too pho­tog­ra­phy in the gallery at vanishingtatoo.com

The truth about polarizing filters

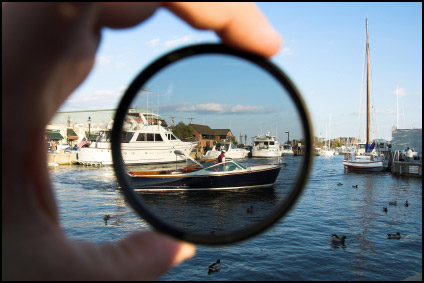
The truth about polar­iz­ing fil­ters is that every pho­tog­ra­pher should have one in his/her bag at all times. It is pos­si­bly THE sin­gle most impor­tant and‚ use­ful photo acces­sory you’ll own. When there is light out­doors, this fil­ter is on my cam­era the vast major­ity of the time.

A CPOL (cir­cu­lar polar­iz­ing fil­ter) can be used any time you’re in the out­doors, espe­cially in the bright sun. It reduces reflec­tions, and deepens/saturates col­ors like a blue sky. In bright sun,‚ you’ll often get skies that are blown out if you don’t use this fil­ter. It makes the sky much bluer and richer look­ing in many cases with­out really affect­ing the other tones in the image. You will note the great­est results when the sun is low in the sky (so early morn­ing and later afternoon/evening). The CPOL will not help your color and sat­u­ra­tion much on over­cast days, or when the sun is high in the sky.

For more infor­ma­tion on this amaz­ing lit­tle gad­get, includ­ing a lit­tle insight into the ‘rule of thumb’ when using a CPOL, visit this link on polar­iz­ers in our pho­tog­ra­phy forum

Here’s a link from B&H where you can look at or pur­chase dif­fer­ent polar­iz­ers.
Buy­ing from this link helps sup­port our site.

Photography subjects that are off limits

What is con­sid­ered ‘off lim­its’ in pho­tog­ra­phy? Well, the answer of course can cer­tainly vary from one pho­tog­ra­pher to the next.

These days, pho­tograph­ing chil­dren raises a red flag for many peo­ple and some pho­tog­ra­phers steer clear away from them. There may be a sense of ‘intru­sion’ into the lives of these chil­dren, and pho­tograph­ing them may just not feel right. There is also the per­ceived risk that some­one may call the author­i­ties sug­gest­ing that the pho­tographs are being taken for sex­u­ally moti­vated rea­sons. Other pho­tog­ra­phers that pho­to­graph chil­dren do so in order to show the true beauty and inno­cence of who chil­dren are. They don’t care about per­ceived risks as they know that the pho­tographs they take are art­ful and eth­i­cal. Com­pletely dif­fer­ent sides of the story, right?

Another inter­est­ing choice of sub­ject to some pho­tog­ra­phers are street scenes — cap­tur­ing the beauty of sur­round­ings with peo­ple pass­ing by. No wrong doing right? Well again, to some pho­tog­ra­phers, there is a sense of dis­com­fort in shoot­ing com­plete strangers with­out get­ting their per­mis­sion first. Other pho­tog­ra­phers that know their rights (it’s legal to pho­to­graph any­one in a pub­lic place) have no issue with the ‘shoot first and ask ques­tions later’ policy.

There are many inter­est­ing sub­jects to shoot, and which is right depends on the photographer’s pref­er­ence, taste, and com­fort zone. What sub­ject mat­ter are YOU uncom­fort­able shoot­ing and why?

For more on this sub­ject, check out the Pho­tog­ra­phy sub­jects — off lim­its thread in our pho­tog­ra­phy forum.

Done to Death

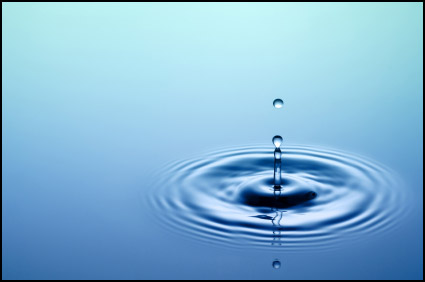
There are so many sub­jects out there to pho­to­graph, yet accord­ing to some, there are also sub­jects that have been ‘done to death’. Sub­jects such as a sun­sets, or ‘drop of water’ close-ups come to mind. What about flow­ers — why are they so pop­u­lar to shoot? Per­haps because flow­ers are acces­si­ble, beau­ti­ful, and they just stand there and smile. Yet flow­ers ( as well as other com­mon ‘over­done’ sub­jects) are quite good learn­ing tools for sev­eral aspects of pho­tog­ra­phy includ­ing DOF, focus, com­po­si­tion, color, and exposure.

There’s also some­thing to be said for the “who gives a crap atti­tude”. Just because these types of shots are com­monly shot, does that mean you should not shoot them? I mean are you NOT going to shoot the Eif­fel tower or the Taj Mahal or a sea of red tulips just because they are com­monly shot? You’re going to shoot them because these are YOUR shots.

If you absolutely adore these types of shots, but feel as if they are all too com­monly done, chal­lenge your­self. Be as cre­ative as you can with the shot and it will be sure to stand out among the rest.

For more on this sub­ject, visit our photo forum: http://www.photography.ca/Forums/showthread.php?t=4202

Thinking Sharp

Have you ever found your­self with a hand­ful of images that just don’t give that ‘crys­tal clear’ or sharp look you wanted out of your images? Well, you are not alone. Many pho­tog­ra­phers run into the same prob­lem. So why the prob­lem and how to fix it?

Along with a high shut­ter speed for mov­ing objects, and good depth of field, the qual­ity of your lens has a lot to do with image sharp­ness. Shutter-speed may affect the sharp­ness of your image if you get to a point where you’re too slow to hand-hold. In gen­eral though, most dig­i­tal images need a tweak in sharp­en­ing. A dig­i­tal photo that was shot with a good depth of field and a high shut­ter speed will nor­mally be blur­rier‚ than the same image shot from a film cam­era. To go about sharp­en­ing, pho­to­shop (or Gimp) have tools (like unsharp mask and smart sharpen) to help you make your images nice and crisp
For more infor­ma­tion on keep­ing your images crispy.. err.. crisp, read more check out this link on our pho­tog­ra­phy forum and this link to a pod­cast on get­ting sharper images.

Lens Hoods are necessary

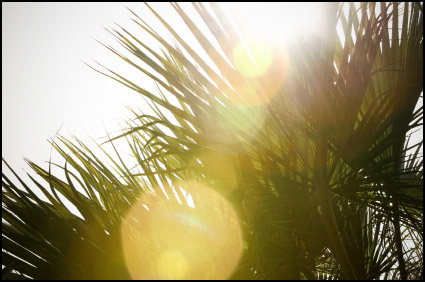
Out of all the acces­sories to buy for your cam­era, is it truly nec­es­sary to invest in a lens hood? The answer is YES. A lens hood will help pro­tect the front of the lens from bumps and acci­dents, but it is also great for pre­vent­ing lens flare. Lens flare hap­pens when light does not flow through the lens to the sen­sor or film but instead, bounces around the lens ele­ments. This cre­ates unusual and unwanted (nor­mally) arti­facts in the image. Com­mon shapes include poly­gons and lin­ear streaks. How­ever flare can also wash out an image in addi­tion to the weird shapes it cre­ates. The shapes of these arti­facts are depen­dent on the lens ele­ments, the aper­ture blades and the angle of the light.‚ A com­mon sit­u­a­tion where this hap­pens is when you are shoot­ing into a light source like the sun or the light source enters the lens from an angle. Although the sun is the most com­mon thing to cause flare, any light source can cause it if it hits the front of the lens at the right angle.

The sim­ple solu­tion to this is buy a lens hood. They are inex­pen­sive and they help pre­vent stray light from enter­ing your lens. Many pros keep them on their lenses 100% of the time, even at night, since city lights and car lights can cause flare.

You could use your hand to block the light of course… it is cer­tainly a cheaper alter­na­tive! But for the long run, the lens hood will be quite ben­e­fi­cial in both pro­tect­ing your lens (from the wild party hap­pen­ing next to you) and in pro­duc­ing shots with­out the ‘unwanted’ flare.

Check out this link in our pho­tog­ra­phy forum for more infor­ma­tion or to com­ment on this topic.

Painting with light

LIGHT PAINTING
Light paint­ing has actu­ally noth­ing to do with ‘paint­ing’ per say, but rather is an artis­tic form of pho­tog­ra­phy. To go about it, choose a sub­ject to shoot, turn off the lights, and while hold­ing your light source, move it around. Play­ing around with‚your shut­ter speed will affect the out­come of the shot; a good shut­ter speed for this type of artis­tic imagery is 20–30 seconds.

Image by Marko Kulik

Image by Marko Kulik

This is a fun way to exper­i­ment with your cam­era and light­ing, and can pro­duce some fab­u­lous results. Best thing? You don’t need to have much‚patience for it! 20–30 min­utes is all you need and you’ll get a nice hand­ful of shots.‚Nice idea when doing this type of exer­cise is to wear black cloth­ing… oth­er­wise you may become the focal point of your shoot!

For some tips and exam­ples check the link in our pho­tog­ra­phy forum
You can also take a lis­ten to our paint­ing with light podcast

Memory Cards

Let’s talk mem­ory cards. More specif­i­cally mem­ory cards with higher writ­ing speeds, qual­ity, and size. Higher writ­ing speeds are a def­i­nite asset when shoot­ing things like wed­dings, lit­tle league games and dance recitals — any­thing that requires you to shoot long bursts of shots. Higher writ­ing speeds are also use­ful when the card is full and you need to trans­fer the images to a com­puter as quickly as pos­si­ble via a card reader.

Qual­ity is cer­tainly not com­pro­mised whether or not you pur­chase a ‘brand name’ ver­sus a ‘no name’ mem­ory card — if the card works, chances are you have pur­chased a fine card which will hold those price­less moments for you.

And what about size… does it really mat­ter? 2GB, 4GB, 8GB… it’s all a mat­ter of pref­er­ence. But a great tip for those who shoot events would be to buy a few smaller mem­ory cards (4 GB) in case some­thing ‘should’ hap­pen to one card, you know you have a few other cards that your shots are on. Now that’s safe think­ing! FORUM LINK:‚ http://www.photography.ca/Forums/showthread.php?t=2522